




Arena Setup
Setting up an arena in TNT Run is done through an intuitive in-game GUI. This guide will walk you through the process from the initial command to the final registration.
Step 1: Create the Arena
Section titled “Step 1: Create the Arena”📸 Preview: How to create an arena
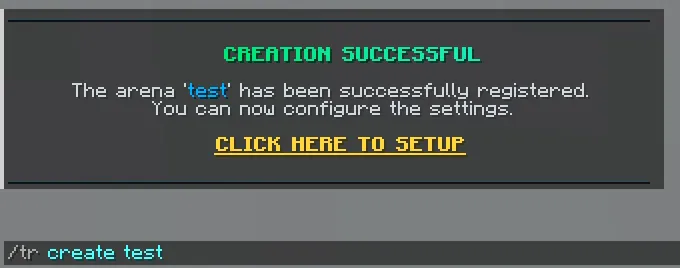
To begin, you need to initialize a new arena instance. Each arena must have a unique ID.
/tntrun create <arena_id>Step 2: Open the Setup Menu
Section titled “Step 2: Open the Setup Menu”📸 Watch: Opening the setup menu

Once the arena is created, enter the Edit Mode to access the configuration GUI.
/tntrun edit <arena_id>This command opens the main setup menu where all configurations are handled.
Step 3: Configure Game Locations
Section titled “Step 3: Configure Game Locations”📸 Watch: Setting teleport locations

Click on the Arena Locations (FILLED_MAP) item in the main menu to set the teleportation points.
- Lobby (
LODESTONE): The location where players are teleported when they join the arena and wait for the game to start. - Start Location (
BEACON): The specific point where players are teleported the moment the game loop begins. - End Location (
END_PORTAL_FRAME): The location where players are sent after the game ends or if they leave.
Step 4: Set Player Amounts Optional
Section titled “Step 4: Set Player Amounts ”📸 Watch: Adjusting player limits

From the main menu, click on Player Amounts (GLOWSTONE_DUST) to define the arena’s capacity.
- Minimum Players: How many players are needed to start the lobby countdown.
LEFT CLICKto increase |RIGHT CLICKto decrease.
- Maximum Players: The total capacity of the arena.
LEFT CLICKto increase |RIGHT CLICKto decrease.
Step 5: Set Optional Settings Optional
Section titled “Step 5: Set Optional Settings ”📸 Watch: Setting optional settings

| Setting | Description |
|---|---|
| Map Details | Map name, author, and difficulty used in scoreboards, signs, messages, and placeholders. |
| Scoreboard Toggle | Enables or disables the scoreboard for this arena. |
| Bossbar Toggle | Enables or disables boss bars for this arena. |
| Potion Effects | Applies configured effects to players when the in-game phase starts. |
Step 6: Create an Arena Sign Optional
Section titled “Step 6: Create an Arena Sign ”📸 Watch: Linking a sign

Look directly at a sign and click the Create Arena Sign (OAK_SIGN) item. This will link the sign to your arena.
The sign will automatically update its status (Waiting, Starting, In-Game, Ending) and display the current player count.
Step 7: Register the Arena
Section titled “Step 7: Register the Arena”📸 Watch: Finalizing the arena

Once you have configured all required locations and player amounts, it’s time to finalize.
Click the Register the Arena (FIREWORK_ROCKET) item. The plugin will validate your settings and, if everything is correct, the arena will be activated and ready for players!
Joining the Game
Section titled “Joining the Game”After successfully registering your arena, players can join the action in two ways:
- By Command: Use
/tntrun join <arena_id>to enter the lobby. - By Sign: If you created an
Arena Sign in Step 6, simply Right-Click the sign to join.
Summary Table
Section titled “Summary Table”| Item | Name | Function |
|---|---|---|
FILLED_MAP | Manage Arena Locations | Open Lobby, Start, and End location settings. |
GLOWSTONE_DUST | Player Amounts | Configure minimum and maximum player limits. |
OAK_SIGN | Create Arena Sign | Link a physical sign to the arena status. |
BOOK | Configure Player Settings | Configure player inventory, effects, and mode. |
PLAYER_HEAD | Reset Arena Records | Clear this arena’s stored best-time records. |
FIREWORK_ROCKET | Register the Arena | Validate, save, and activate the arena. |